Windows with ArcGIS Pro or Server
Prerequisites
64-bit x86 processor (ARM is not currently supported)
Microsoft Windows 10 or later, or Windows Server 2016 or later
ArcGIS Pro 3.2.2 or later, or ArcGIS Server 11.2 or later
Optional software
These are required to run certain parts of MGET. You can wait to install them later if desired. MGET will report detailed error messages when missing optional software is needed. Be sure to shut down all ArcGIS programs before installing them.
ArcGIS Spatial Analyst extension. This is required by a number of MGET tools produce rasters. If your ArcGIS license includes this extension but you did not install it, you can re-run the ArcGIS setup program to add it to your installation.
MATLAB Runtime R2024b (free) or the full version of MATLAB R2024b (not free). Either one is OK. These are required for front detection, larval dispersal simulation, and certain interpolation tools. You must install version R2024b; other versions will not work. Multiple versions can be installed at the same time, so if you use a different version of MATLAB for your own work, you can continue to do so, providing you install the R2024b Runtime for MGET’s use.
Windows with ArcGIS Pro installation instructions
MGET is a Python package. ArcGIS Pro utilizes conda to manage Python packages, which works best for projects that have been specifically packaged for deployment with conda. We have not packaged MGET with conda yet. Until that time, you can use pip to install MGET into an existing ArcGIS Pro conda environment. The practice of installing packages with pip into conda environments is generally discouraged, but it does work for MGET.
To get started, you first need to install some packages that MGET needs that
are not provided by ESRI in the default arcgispro-py3 environment. When we
eventually release MGET as a conda package, conda will take care of these
dependencies automatically, but until then you need to do it yourself. To keep
your conda environment as problem-free as possible, you should use conda
rather than pip to install these, and only use pip to install MGET.
Step 1. Install micromamba
Unfortunately, ArcGIS Pro 3.2 ships with version 4.14.0 of conda, which
predates the introduction of the libmamba solver into
conda. The pre-libmamba solver is notoriously slow, and when we tried to
install one of the packages MGET requires (copernicusmarine), it hung with the
message Solving environment for a very long time, and then wanted to
upgrade dozens of packages to the latest versions, which was unnecessary and
risky. You can work around this by first installing micromamba and
using it to install dependencies into your conda environment instead of conda.
micromamba is a stand-alone, drop-in replacement for conda that does not
tamper with your conda installation.
Start Windows PowerShell.
Open micromamba Automatic installation in your browser and copy the Windows PowerShell installation expression. It begins with
Invoke-Expression.Paste that into PowerShell and run it. If are asked “Do you want to initialize micromamba for the shell activate command?”, enter
nunless you know what it means and want to do it.Close PowerShell.
Step 2. Clone the arcgispro-py3 environment
We strongly advise you not to install MGET or its dependencies into the
default arcgispro-py3 environment that ArcGIS Pro creates when it
installs. Instead:
Follow ESRI’s instructions to clone
arcgispro-py3to a new environment. In these instructions, we’ll assume your copy is calledarcgispro-py3-mget. Alternatively, if you already have another environment you wish to use, you can skip this step.Activate the new environment you created, or the existing one you want to use.
Step 3. Using micromamba, install packages needed by MGET
Thankfully, ESRI preinstalls many packages into the default arcgispro-py3
environment that you cloned, but there are a few we still need.
Click Start, open the ArcGIS folder, and start the Python Command Prompt. It should show your desired environment as part of the command prompt, similar to this:
(arcgispro-py3-mget) C:\Users\Jason\AppData\Local\ESRI\conda\envs\arcgispro-py3-mget>
Run the following command to install the packages:
If you have ArcGIS Pro 3.2.x:
micromamba install --channel conda-forge --yes copernicusmarine==1.3.0 aiohttp==3.9.5 docutils scikit-fmm
If you have ArcGIS Pro 3.3 or later:
micromamba install --channel conda-forge --yes copernicusmarine docutils scikit-fmm
Step 4. Install MGET with pip
Now we just need to install MGET, which is known as the mget3 package on
pipy. If you want pip to download it
automatically from pypi, use the following command from Python Command Prompt:
python -m pip install --no-deps mget3
Important: Do not remove the --no-deps flag. If you do, pip may fail
to recognize that ESRI already installed the gdal package and pip may try to
install gdal again, which will fail. (ESRI has told us this workaround will
no longer be necessary in ArcGIS Pro 3.4)
If you closed the Python Command Prompt in Step 3, just start it again. But
make sure it shows the same environment as you used before
(arcgispro-py3-mget in this example). If you want to install MGET from a
wheel (.whl) file that you obtained yourself, rather than doing it
automatically from pypi, just replace mget3 in the command above with the
path to the wheel file.
Click here for some examples of accessing MGET from Python.
You can install MGET into multiple conda environments simultaneously. To do that, repeat steps 2–4 for each environment.
Step 5. Add the MGET toolbox to ArcGIS Pro
To use MGET’s geoprocessing tools from ArcGIS Pro, you need to add the toolbox to an ArcGIS Pro project:
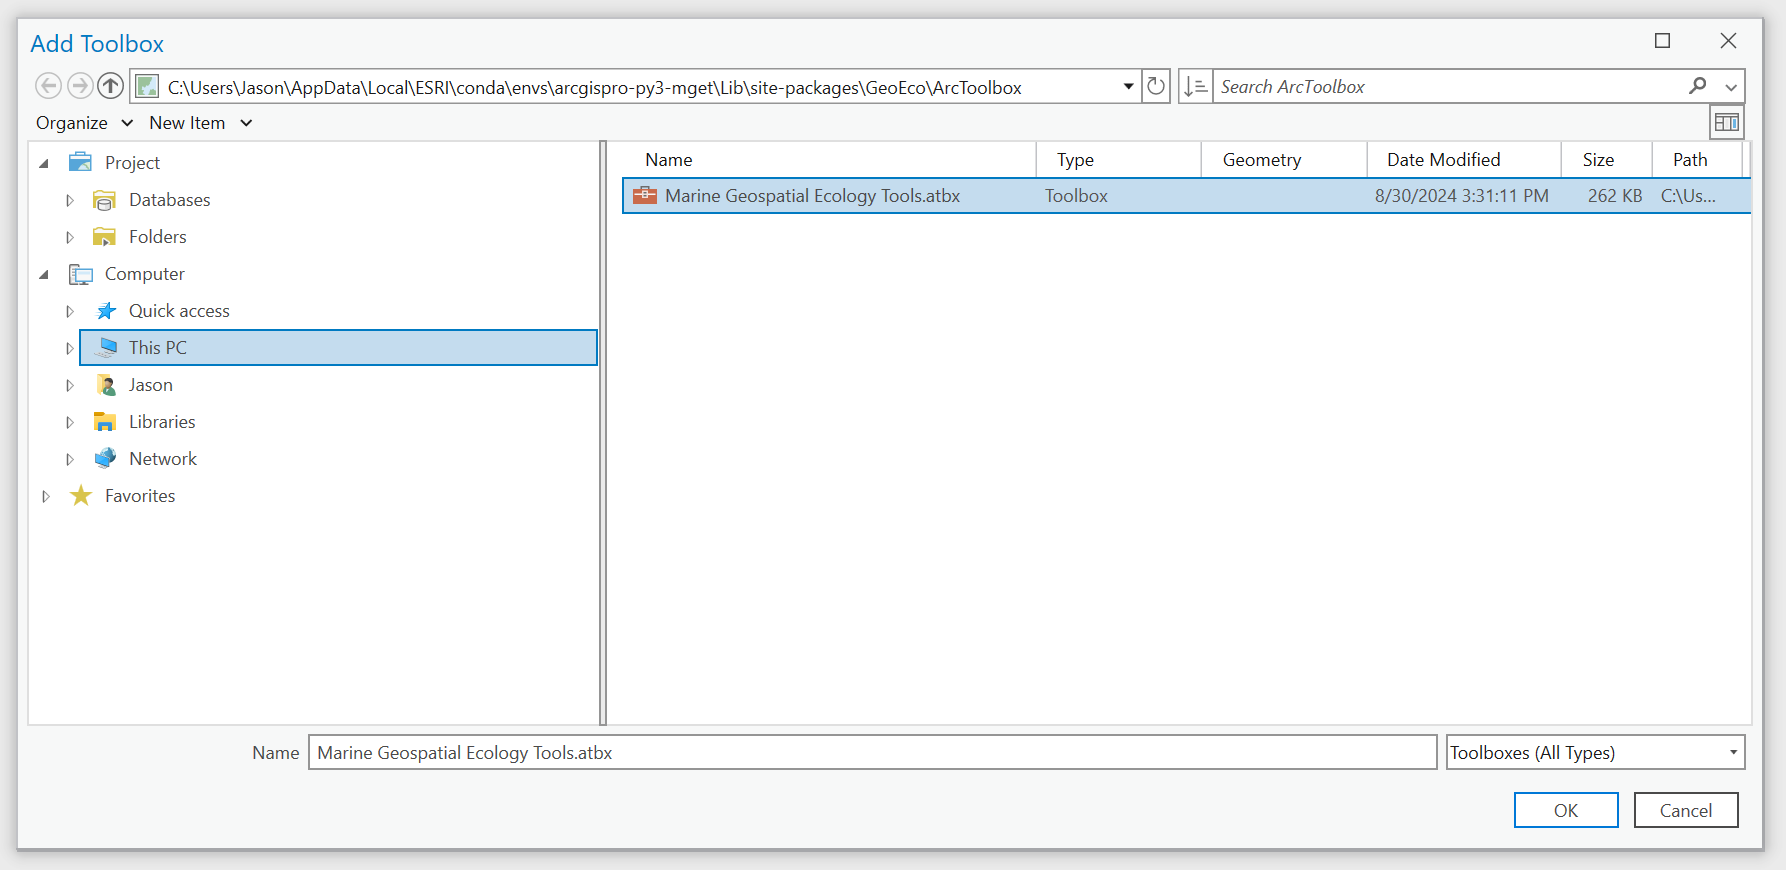
Select the Insert ribbon and find the Toolbox drop-down menu. Then select Add Toolbox:

In the Add Toolbox dialog box, navigate to the folder that contains your Python environment. Typically this is a subfolder of the
C:\Users\<username>\AppData\Local\ESRI\conda\envsfolder. In the example below, the environment subfolder is namedarcgispro-py3-mget. Inside that subfolder, navigate toLib\site-packages\GeoEco\ArcGISToolbox. Select the fileMarine Geospatial Ecology Tools.tbxand click OK:
Now you can access the toolbox from the Geoproessing pane. After opening the Geoprocessing pane, click on Toolboxes and then drill into the toolbox to find tools of interest. Alternatively, you can search for tools by name in the Find Tools box:

Click here for some examples of using MGET’s geoprocessing tools.
Uninstalling MGET
MGET may be uninstalled like any other Python package. However, because we installed it to your ArcGIS conda environment using pip, we must also uninstall it with pip rather than with conda.
Close all ArcGIS programs.
If necessary, activate the environment you want to uninstall MGET from. If that environment is already activated, you can skip this step.
Click Start, open the ArcGIS folder, and start the Python Command Prompt. It should show your desired environment as part of the command prompt, similar to this:
(arcgispro-py3-mget) C:\Users\Jason\AppData\Local\ESRI\conda\envs\arcgispro-py3-mget>
Run the following command to uninstall MGET:
python -m pip uninstall mget3
Alternatively, if you no longer need the conda environment, you can just delete the enviornment. There is no need to uninstall MGET from it first.
Windows with ArcGIS Server installation instructions
In principle, MGET should work on ArcGIS Server so long as the prerequisite Python packages have been installed, as described above in the Windows with ArcGIS Pro installation instructions. ESRI provides some guidance on installing Python packages on ArcGIS Server for Windows in this article But we have not tested this yet so we don’t know for sure. We’ll update this documentation once we have the opportunity to try it.